- Connex for QuickBooks User Guide
- Getting Started with Connex for QuickBooks
-
Connex for QuickBooks User Guide
- Getting Started with Connex for QuickBooks
- Remote Desktop (RDP)
- Customers Matching
- Inventory Site
- Inventory Sync
- Multicurrency
- Orders
- Price Levels
- Products
- Refunds
- Sales Tax
- Sales Orders
- Unit of Measure
- Web Connector
- Getting Started with Rules
- Rules Engine Common Rules
- FAQ
- Deposit Match
- Cost of Goods Sold
- Troubleshooting
-
Connex Inventory Planner
-
Frequently Asked Questions
-
General Troubleshooting Guide
- Deposit Match Troubleshooting
- QuickBooks Desktop Error Messages
- Inventory Troubleshooting
- Incorrect Orders Troubleshooting
- Sales Tax Troubleshooting
- Web Connector Troubleshooting
- QuickBooks Online Error Messages
- Match Deposit Tool Troubleshooting
- Product Matching Troubleshooting
- Customer Matching Troubleshooting
- Rules Engine
- Orders from QuickBooks
- Payments Troubleshooting
- Missing Orders Troubleshooting
- Company File
-
Connex for QuickBooks Integrations Guide
-
Rules Engine Guide
Getting Started with Connex for QuickBooks: Account Registration
To register for a Connex for QuickBooks account, follow these steps
I use QuickBooks Online. How do I pair and register?
By pairing, Connex will pair QuickBooks and register you. Here are the steps:
- Go to connexforquickbooks.com/login
- Click QuickBooks Online.
- Click the sign in button:
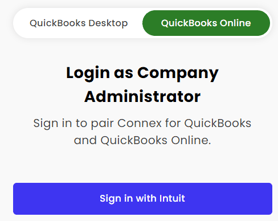
- Connex will redirect you to a QuickBooks Online sign in page. Login as the company file admin.
- Agree to pair QuickBooks Online.
- Connex will create a user name that is the same as QuickBooks Online. To sign in again, visit our site and click the sign in button.
- You will be asked to choose a price plan.
- Pay at Stripe and start your trial.
How do I register as a QuickBooks Desktop user?
For QuickBooks Desktop users, you must register for a Connex account. Once complete, you are asked to choose a subscription for a free trial.
- Go to connexforquickbooks.com.
- Click register.
- Complete the form.
- Choose a price plan.
- Pay at Stripe.
- You will return to our dashboard.
🔷 Next Step: Add a New Integration (Step 2)