-
Connex for QuickBooks User Guide
- Getting Started with Connex for QuickBooks
- Remote Desktop (RDP)
- Customers Matching
- Inventory Site
- Inventory Sync
- Multicurrency
- Orders
- Price Levels
- Products
- Refunds
- Sales Tax
- Sales Orders
- Unit of Measure
- Web Connector
- Getting Started with Rules
- Rules Engine Common Rules
- FAQ
- Deposit Match
- Cost of Goods Sold
- Troubleshooting
-
Connex Inventory Planner
-
Frequently Asked Questions
-
General Troubleshooting Guide
- Deposit Match Troubleshooting
- QuickBooks Desktop Error Messages
- Inventory Troubleshooting
- Incorrect Orders Troubleshooting
- Sales Tax Troubleshooting
- Web Connector Troubleshooting
- QuickBooks Online Error Messages
- Match Deposit Tool Troubleshooting
- Product Matching Troubleshooting
- Customer Matching Troubleshooting
- Rules Engine
- Orders from QuickBooks
- Payments Troubleshooting
- Missing Orders Troubleshooting
- Company File
-
Connex for QuickBooks Integrations Guide
-
Rules Engine Guide
Can I use the QuickBooks Online shipping field?
By default, Connex for QuickBooks Online adds shipping as a line item. If you want to add the shipping to the QuickBooks Online shipping field, follow these steps:
Problem
Shipping info fails to appear on the sale.
Description
Ship date, tracking number, and shipping appear as a line item, instead of their respective fields.

Solution
Enable use QBO shipping fields
Here are the steps:
- Login to Connex.
- Click settings.
- Expand advanced settings.
- Check use QuickBooks Online shipping field:
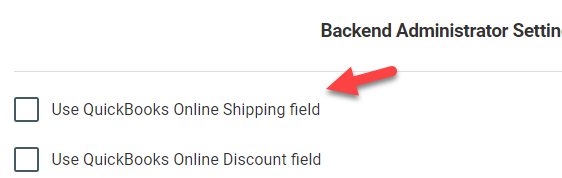
- Click save.
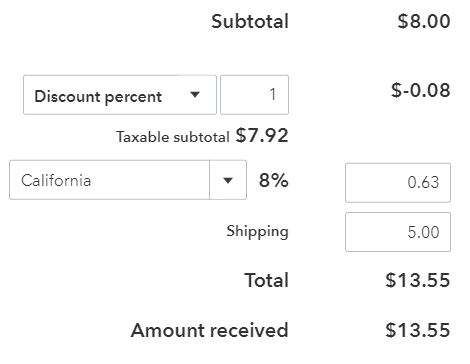
Once you sync a sale, here is the end result:

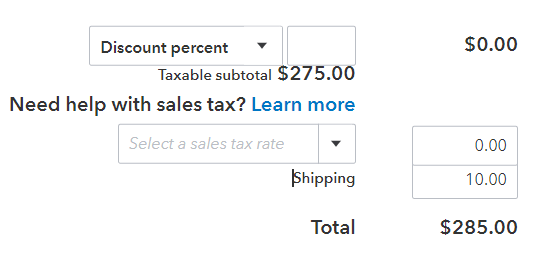
Can I add sales tax to shipping and use the QuickBooks Online shipping field?
Not at this time. QuickBooks charges tax on the sub total, then adds shipping:
Set Up Fields in QuickBooks Online
To set this up in QuickBooks, follow these steps:
- Login to QuickBooks Online.
- Click the gear on the top right.
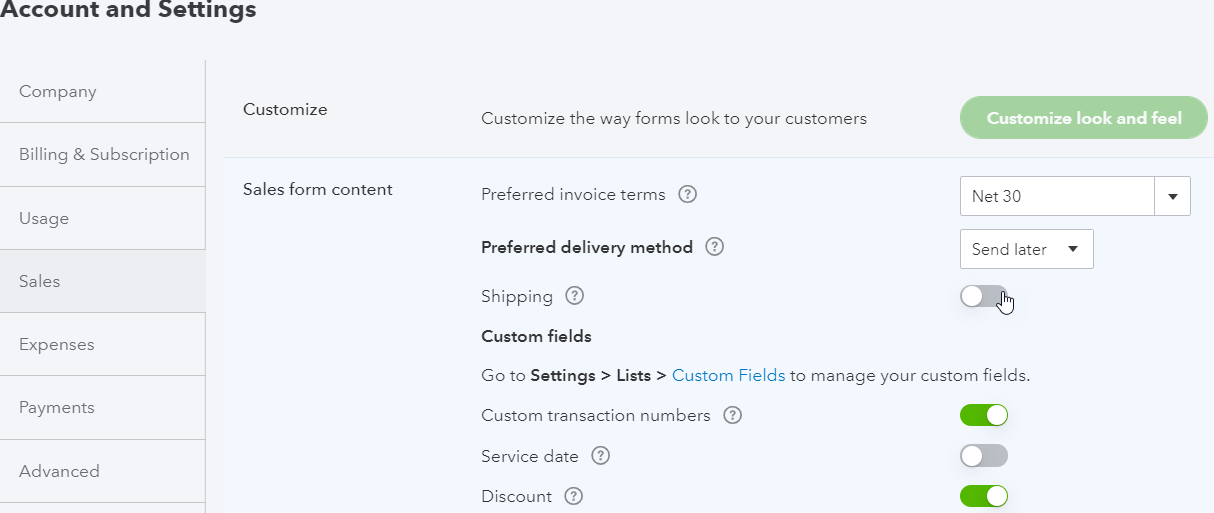
- Under company on the left, click account settings:
- Under sales > sales form content, ensure that the checkbox for shipping is checked:
- Click the Advanced tab.
- Under chart of accounts, ensure that an account has been selected for shipping:
